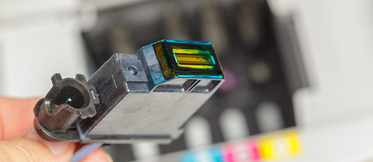
How to clean print heads on Brother DCP-J140W

Why is it necessary to perform a head clean on your printer? How can you clean the print heads on your Brother DCP-J140W? These devices keep adding on new functionalities that make our lives easier, and automatic print head cleaning is one of them.
We recommend running a print head clean when your printed pages begin to show a lower quality: horizontal lines in text or graphics or blurred or faded text and images. This procedure will consume some of your cartridges ink, so it advisable to use it only when truly necessary.
Print head cleaning on Brother DCP-J140W
- Press ‘Menu’.
- Use the Up or Down arrow keys to choose ‘Ink’ or ‘Ink Management’, and then press ‘OK’.
- Use the Up or Down arrow keys until you find ‘Test Print’ and then press ‘OK’.
- Use the Up or Down arrow keys to choose ‘Alignment’ and press ‘OK’.
- Now you can choose between cleaning ‘black only’, ‘colour only’ or both. After selecting the option you prefer, press ‘Start’.
- The printer will now start printing.
Print head cleaning on Brother DCP-J140W with touchscreen
- Press the Left or Right arrows to display ‘Ink’, and then select this option.
- Now use the Up or Down arrows until you find ‘Test Print’ and then press this option.
- Press ‘Alignment’.
- Choose between cleaning black cartridges or colour cartridges, and then press ‘Start’.
- The printer will now start printing.